Part 3 – Automating SSL Certificate Creation and Renewal Using ACMEbot
Part 3 of 5 from the series Deploying a Cheap, Secure, and Automated WordPress Website on Azure.

Prerequisites:
-Completed Part 2 where we configured our custom domain and DNS in Azure and Cloudflare.
A very important piece of your website’s security is having a trusted SSL certificate bound to it. The SSL certificate enables the encrypted connection that web browsers rely on to connect securely to your website.
Purchasing and renewing SSL certificates is a costly and time-consuming process. On top of being a security flaw, when an SSL certificate is expired it will cause a browser error for your site’s visitors, and cause the site to rank poorly on Google.
To solve this problem, we will use a community-created Azure Function called Key Vault Acmebot. This Azure Function will automate the issuance and renewal of ACME SSL/TLS certificates. It stores certificates it retrieves in the Azure Key Vault.
In this post, we will cover deploying Key Vault Acmebot (Azure Function), generating an API token from Cloudflare, configuring Key Vault Acmebot’s Application settings, configuring the Azure Keyvault’s permissions, and finally, accessing the Azure function through the web and generating an SSL certificate from Let’s Encrypt.
Sign into Azure.
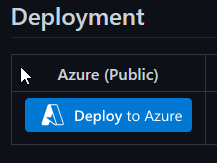
1. Our first step is to deploy the Key Vault Acme bot into our tenant. Browse to GitHub and click Deploy to Azure.
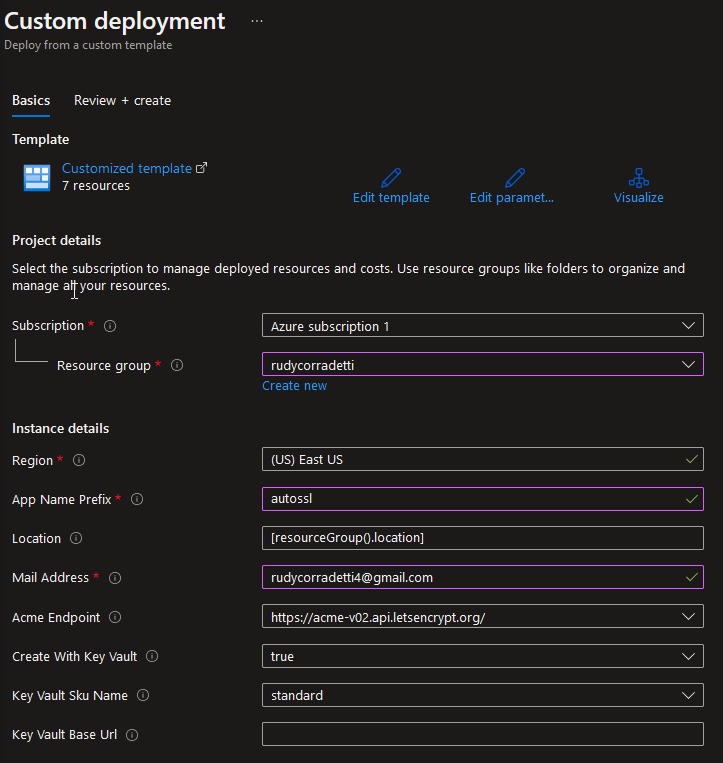
2. This brings us to the custom deployment screen.
-Choose Subscription
-Select resource group where Acme bot will be deployed
-App Name Prefix is the name of the app – I went with autossl.
– Mail address, this is your Let’s Encrypt email address
3. Azure will do final validation checks. You should see a validation passed message. Go ahead and click Create. This will begin the creation of the Acme bot. It should complete within a few minutes.
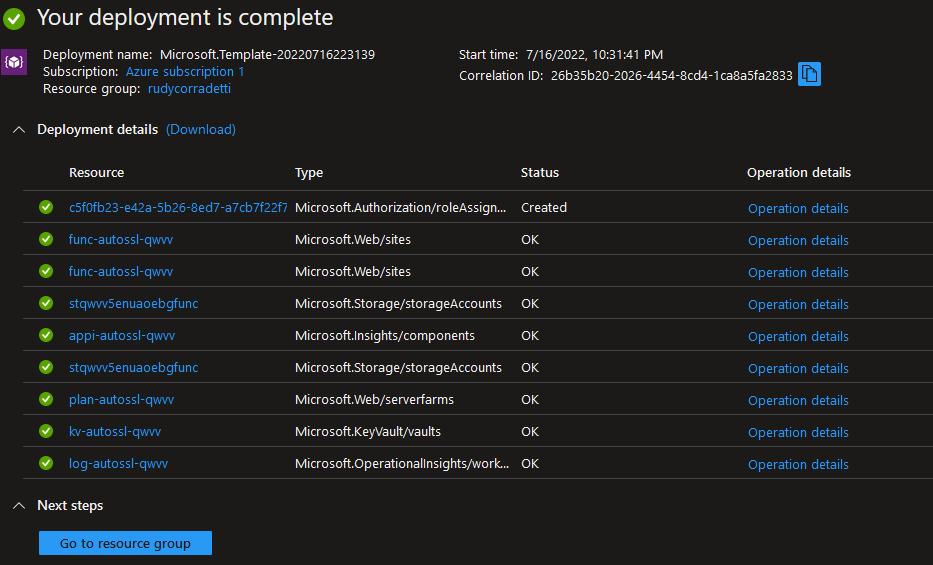
4. Now that our Acmebot is deployed we need to configure it. Open Function App and click the function you just created. Here is what ours looks like.

5. Once you have located the Acmebot Azure Function click on it and browse to the Configuration settings section. Add the below application settings.
Acmebot:VaultBaseUrl- DNS name of the Azure Key Vault (if you are using an existing Key Vault)
- leave blank if not using existing Key Vault
Acmebot:MitigateChainOrder- Set to true, you can avoid incorrect order in the Application Gateway
Acmebot:RenewBeforeExpiry- Set the number of days to renew a certificate before it expires (default 30)
There are also additional settings that will be automatically created by Key Vault Acmebot:
Acmebot:Endpoint- The ACME endpoint used to issue certificates
Acmebot:Contacts- The email address (required) used in ACME account registration
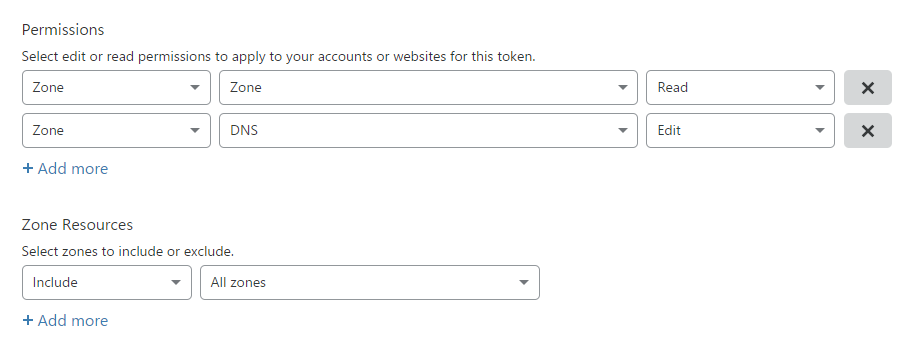
6. Log into your Cloudflare dashboard and browse to the API Tokens section.
7. Generate a new API Token with Zone:Read and DNS:Edit permissions. Note: Zone is your website’s DNS zone.
8. Back in your Acmebot Azure Function, click on Configuration, and add the below Application setting to allow our bot to communicate to Cloudflare’s API.
Acmebot:Cloudflare:ApiToken
9. To summarize, these are all of the Application settings you need to add to your Acmebot Azure Function. If you have any issues. You can use the Acme bot wiki to assist. Included in References below.
Acmebot:VaultBaseUrlAcmebot:MitigateChainOrderAcmebot:RenewBeforeExpiryAcmebot:EndpointAcmebot:ContactsAcmebot:Cloudflare:ApiToken
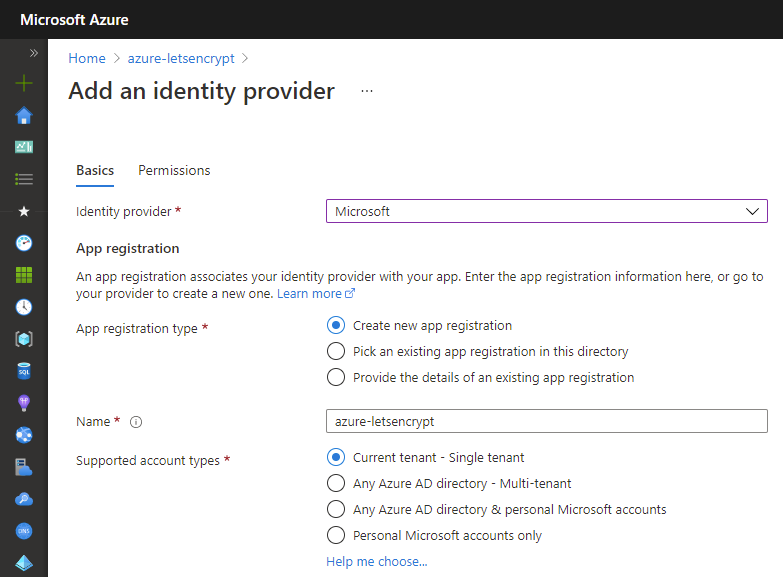
10. In the Azure Portal, open the Function blade then select the Authentication menu and enable App Service authentication.
11. Click on the Add identity provider button to display the screen for adding a new identity provider. If you select Microsoft as your Identity provider, the required settings will be automatically filled in for you. The default settings are fine.
12. In the Azure portal, open the Key vault associated with your Acmebot deployment. Open the Access policies settings. Switch the permission model to Vault access policy.

13. From here, we need to add three separate access policies. Click Add Access Policy, fill in the below settings. For this access policy leave the key, secret, and certificate permissions from the template as defaults.
Administrator access policy –
-Configure from template – Key, Secret, & Certificate Management
-Select principal – Select an administrator user of the keyvault. This permission is needed to add the cert to the binding in part 4 of this series.
-Click Add
App Service access policy –
-Configure from template – Secret and Certificate Management
-Key, Secret, and Certificate permissions – Get, List for each of them
– Select principal – Select Microsoft Azure App Service. This permission is needed to add the cert to the binding in part 4 of this series.
-Click Add
Acmebot access policy –
-Configure from template – Secret and Certificate Management
-Key, Secret, and Certificate permissions – Leave as defaults, grant all permissions
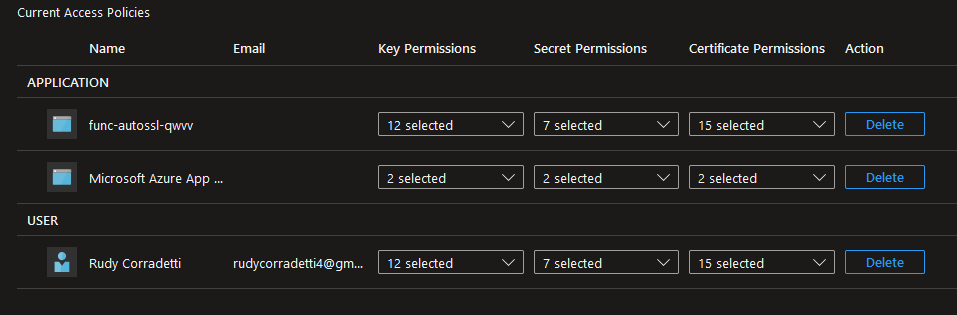
– Select principal – Name of your Acmebot function. This permission is needed for the Acmebot to write the certificate to this keyvault.-Click Add
Upon completion, your Current Access Policies for this key vault should look similar to mine.
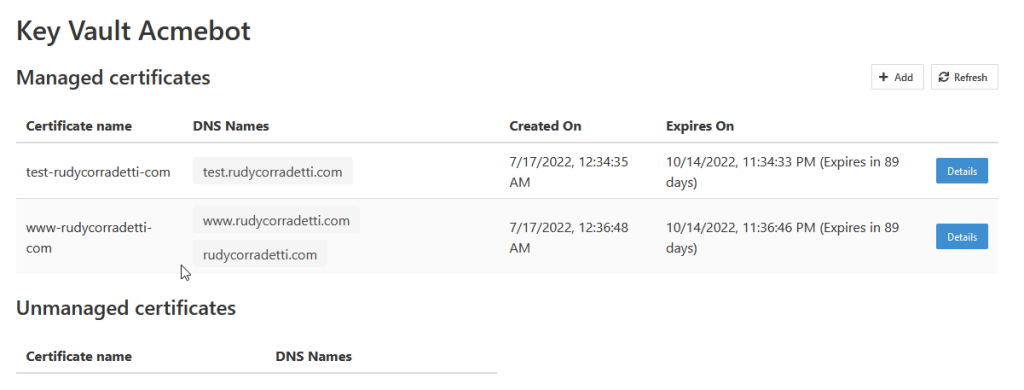
14. Access https://YOUR-FUNCTIONS.azurewebsites.net/dashboard with a browser, you will see a list of certificates managed by Acmebot.
From this dashboard, you can easily issue new certificates and renew and revoke existing ones.
There you have it. You now have a method to automatically generate and store SSL certificates in Azure.
Plus, they automatically renew! Goodbye annoying certificate renewals!
All existing ACMEbot certificates are automatically renewed 30 days before their expiration. The default check timing is 00:00 UTC.
We are not done yet, we still need to generate a certificate, bind it to our website, and force HTTPS. That is what we cover in part 4 of the series.
Thanks for making it this far!
-Rudy
References:
https://github.com/shibayan/keyvault-acmebot/wiki
https://github.com/shibayan/keyvault-acmebot/wiki/Frequently-Asked-Questions
https://azure.microsoft.com/en-us/services/key-vault/#product-overview
https://docs.microsoft.com/en-us/azure/azure-functions/
3 thoughts on “Part 3 – Automating SSL Certificate Creation and Renewal Using ACMEbot”