Part 4 – Configuring SSL/TLS Settings
Part 4 of 5 from the series Deploying a Cheap, Secure, and Automated WordPress Website on Azure.
Prerequisites:
-Completed part 3 where we configured our custom domain and DNS in Azure and Cloudflare.
If you’ve made it to this point, you have successfully setup a WordPress site using Azure App Service.
You have setup Cloudflare as your DNS provider and reverse proxy.
You deployed Acmebot as an Azure function, configured its Application settings, configured the associated Azure Key vault’s permissions, and were able to access the Acmebot dashboard.
In this post, we will generate an SSL certificate using Acmebot, add it to our Azure App Service WordPress site, bind it to port 443 and force HTTPS within Azure App Service and Cloudflare. By its end, you will have successfully setup forced, automated, end-to-end encryption for your WordPress site.
Sign into Azure
1. Open your Acmebot dashboard –
-https://YOUR-ACMEBOT-FUNCTION-HERE.azurewebsites.net/dashboard
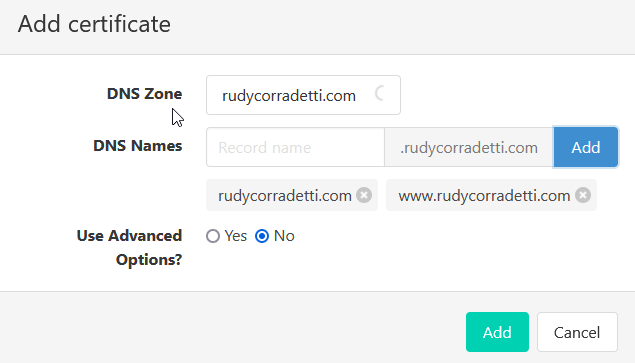
2. From the dashboard, click add to generate an SSL certificate from Lets Encrypt, you need to add the below SANs –
-https://yoursite.com
-www.yoursite.com

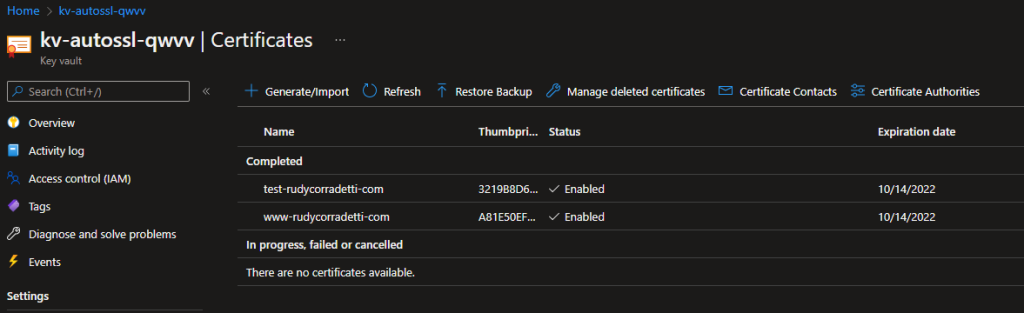
3. Open the associated Azure Key Vault that you were working with in part 3. Verify that you see the certificate you just created here.
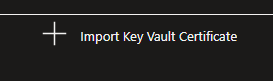
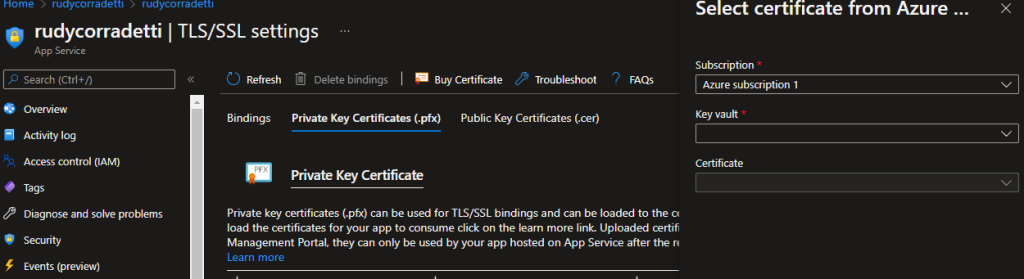
4. Now that we have generated the certificate and verified it is in our key vault browse back to the App Service blade for your WordPress site. From here, click TLS/SSL settings, then click on the Private Key Certificates (.pfx) menu. Finally, click Import Key Vault Certificate. Select the correct key vault and certificate you just generated.
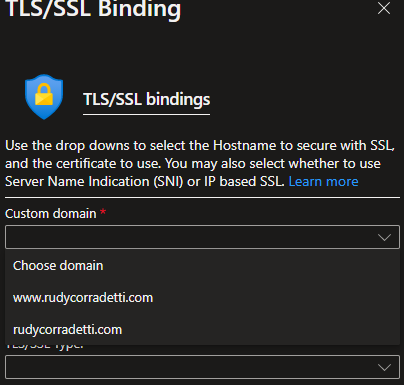
5. Now that you have imported the SSL certificate into your site you need to bind it to port 443. Click on the Bindings menu and click Add TLS/SSL Binding. From here you. need to add a binding for each custom domain. Once completed you should have something similar to mine.
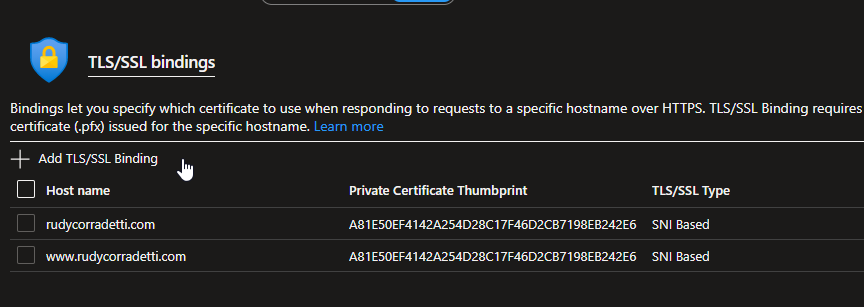
Awesome, now we have successfully added an SSL certificate for www and the root of our site. Yay, no more browser warnings, no more cert renewals, and better SEO!
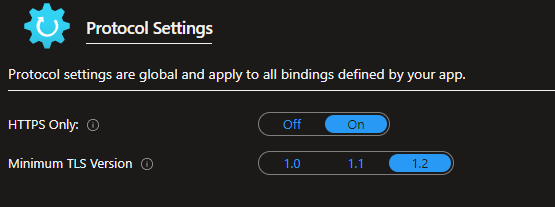
We still have some work to do. We now need to force browsers to only connect to our website over HTTPS. There are many reasons why we want to do this. See this article from Cloudflare on why this is an essential step.
6. On the same page, set HTTPS Only: to On and Minimum TLS Version to 1.2.
7. Open your Cloudflare Dashboard > Domain Registration > Manage DNS > SSL/TLS and set encryption mode to Full (strict).
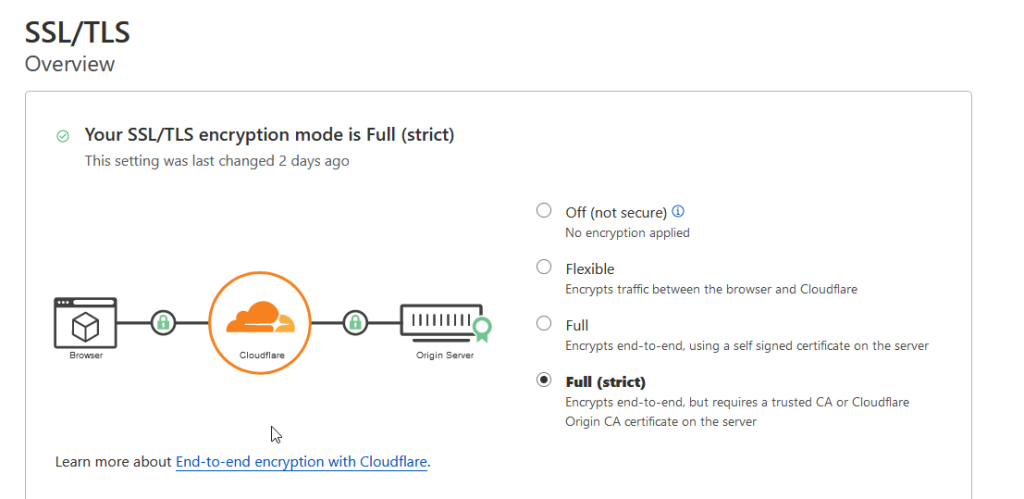
There you have it, you’ve now forced end-to-end HTTPS encryption using Azure and Cloudflare.
Thank you so much for reading this far :).
Be sure to join us for part 5 of the series where we will configure a budget and set an alert to notify us when the site is under a heavy load.
-Rudy
References:
https://docs.microsoft.com/en-us/azure/app-service/configure-ssl-bindings
https://www.cloudflare.com/learning/privacy/what-is-end-to-end-encryption/
https://github.com/shibayan/keyvault-acmebot/wiki/Frequently-Asked-Questions#automatic-renew-an-existing-certificate
4 thoughts on “Part 4 – Configuring SSL/TLS Settings”